Hi all! I have great news…….. drum roll please……… I am spending the last few months of the year over at Mood Sewing Network! I am so elated to be a part of this experience. If you aren’t aware Mood Fabrics is fabric store located in New York & LA, however, they have an amazing website full of all the fabrics they offer in store, along with trims, notions, etc. They have another branch of their website called Mood Society, which has amazing patterns, and is a large source of inspiration, but the best part is it’s FREE! It can’t get better than that right?! Well, guys let’s jump right in!


Today, I will be giving a tutorial on an underbust corset. I actually was inspired by one of my friends, she had a real cute leather one that had harness straps & everything. It was so perfect, however, my style is a tad bit girlier, so I searched for some inspiration. Here’s what I found:


These underbust corsets have been around for a very long time, and they just gradually change and evolve as time goes on. It can be worn dressed up, with a street style look, or even with a costume. I thought this would be the perfect tutorial, because I hadn’t seen that many out there & I am in love with the look, so I decided to make a simplified tutorial.
First you will need to start with materials. You will need:
a cheap or old bra
under- wire for bras (the part that stabs you in the ribs when you need a new bra)
boning (1-1.5 yds of feather weight boning)
fabric (2 yards for actual & lining)
thread
whatever closure you choose (options: zippers, hook and eyes)

The fabric I chose was a cotton stretch sateen from a Mood Exclusive Collection called Sweltering Society. I absolutely love prints so this was right up my alley. It also had a good amount of stretch in it, so I thought it would be good for the dress I would put underneath the corset.
The first step in creating in corset is to take the underwire out of the bra. I still left the casing on the bra, because it created a bit of extra shape. Next, I took my measurements. These need to be as accurate as possible. You will need to get your high bust measurement, waist, stomach (there is a difference) & torso measurement for wherever you would like it to end. My corset is shorten, because I don’t believe my torso is that long. Some corsets work by tying them in the back, or front so that gives a bit of ease to adjust to your body, however, for mine I did not go with this method. It is much easier to drape to make a corset, but my dress form is not my size & it would be equally as long to grade so I used some of the same directions as the bra. So I will show you how to use the back of the bra for such measures.

First, you will seam rip the underwire part out of your bra. Keep in mind I kept my casing with the underwire, which will look like the picture above with the pink fabric. Next, you will cut the padding out of the bra & you will be left with this. This part will be used as a pattern, if you do not have a dress form that fits you or you do not feel like grading it to be your size, however, a dress form is more accurate. Next you will cut the side seams. This doesn’t have to be perfect, because you are going to redraw & add seam allowance. You are going to extend the length of the bra & depending on your measurements for your stomach, waist & torso. So, using myself as an example, my waist goes in a little bit, but not enough for a dramatic definition, so my pattern tended to be a bit “boxier.” I will show my rough sketch for an example.

Next you will cut your your lining fabric exactly the same as the body of the fabric. You will sew your pieces all together & your lining pieces all together & now you have two full pieces sewn pieces, the lining & the body. Now you are ready to move on to the boning, sit. your lining aside of now. You will use your main fabric and on the wrong side of the fabric, we will begin to add boning. You will want to leave 1/2 in. to flip your garment inside out so start from a 1/2 in down from each seam & add boning.

Next, you will sew over where the white stitches are. Do not be afraid to accidentally run over the boning, but keep your line as straight as possible, because it will create lines on the front of your corset. Like this ….

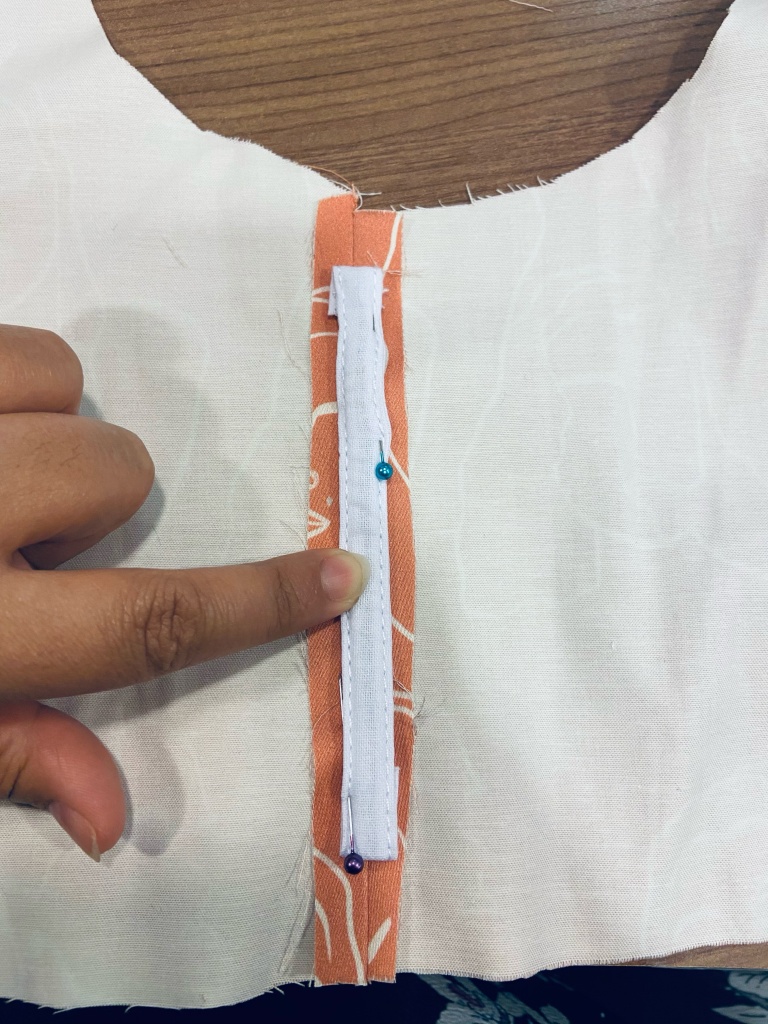
After you complete this step you will match the lining & the main fabric & sew completely together, but leaving the sides or cent front open. You will clip & cut corners & then turn the garment moving the boning to the other side. Press. Next you will move on to the underwire. For this part I decided to cover it. First I pinned it all down to make sure it could completely cover it.

I stitched around the smallest part of the circle then pinned it to the top & re-stitched the first stitching on the bottom, then did one more stitch at the top.

You are almost done! You will now put the closing on the center front, whether it is a zipper, hook & eyes, or buttons, etc. I chose to just close mine without a closure since it stretches.

Annnnnnd walla! You have made your very own under bust corset!


THIS IS SO CUTE MACY! I love how you can wear it with anything really, its so fun, and its flirty. I never thought of one but now I may look into it! This was good! Amazing; per usual
LikeLike